

Ready to talk?

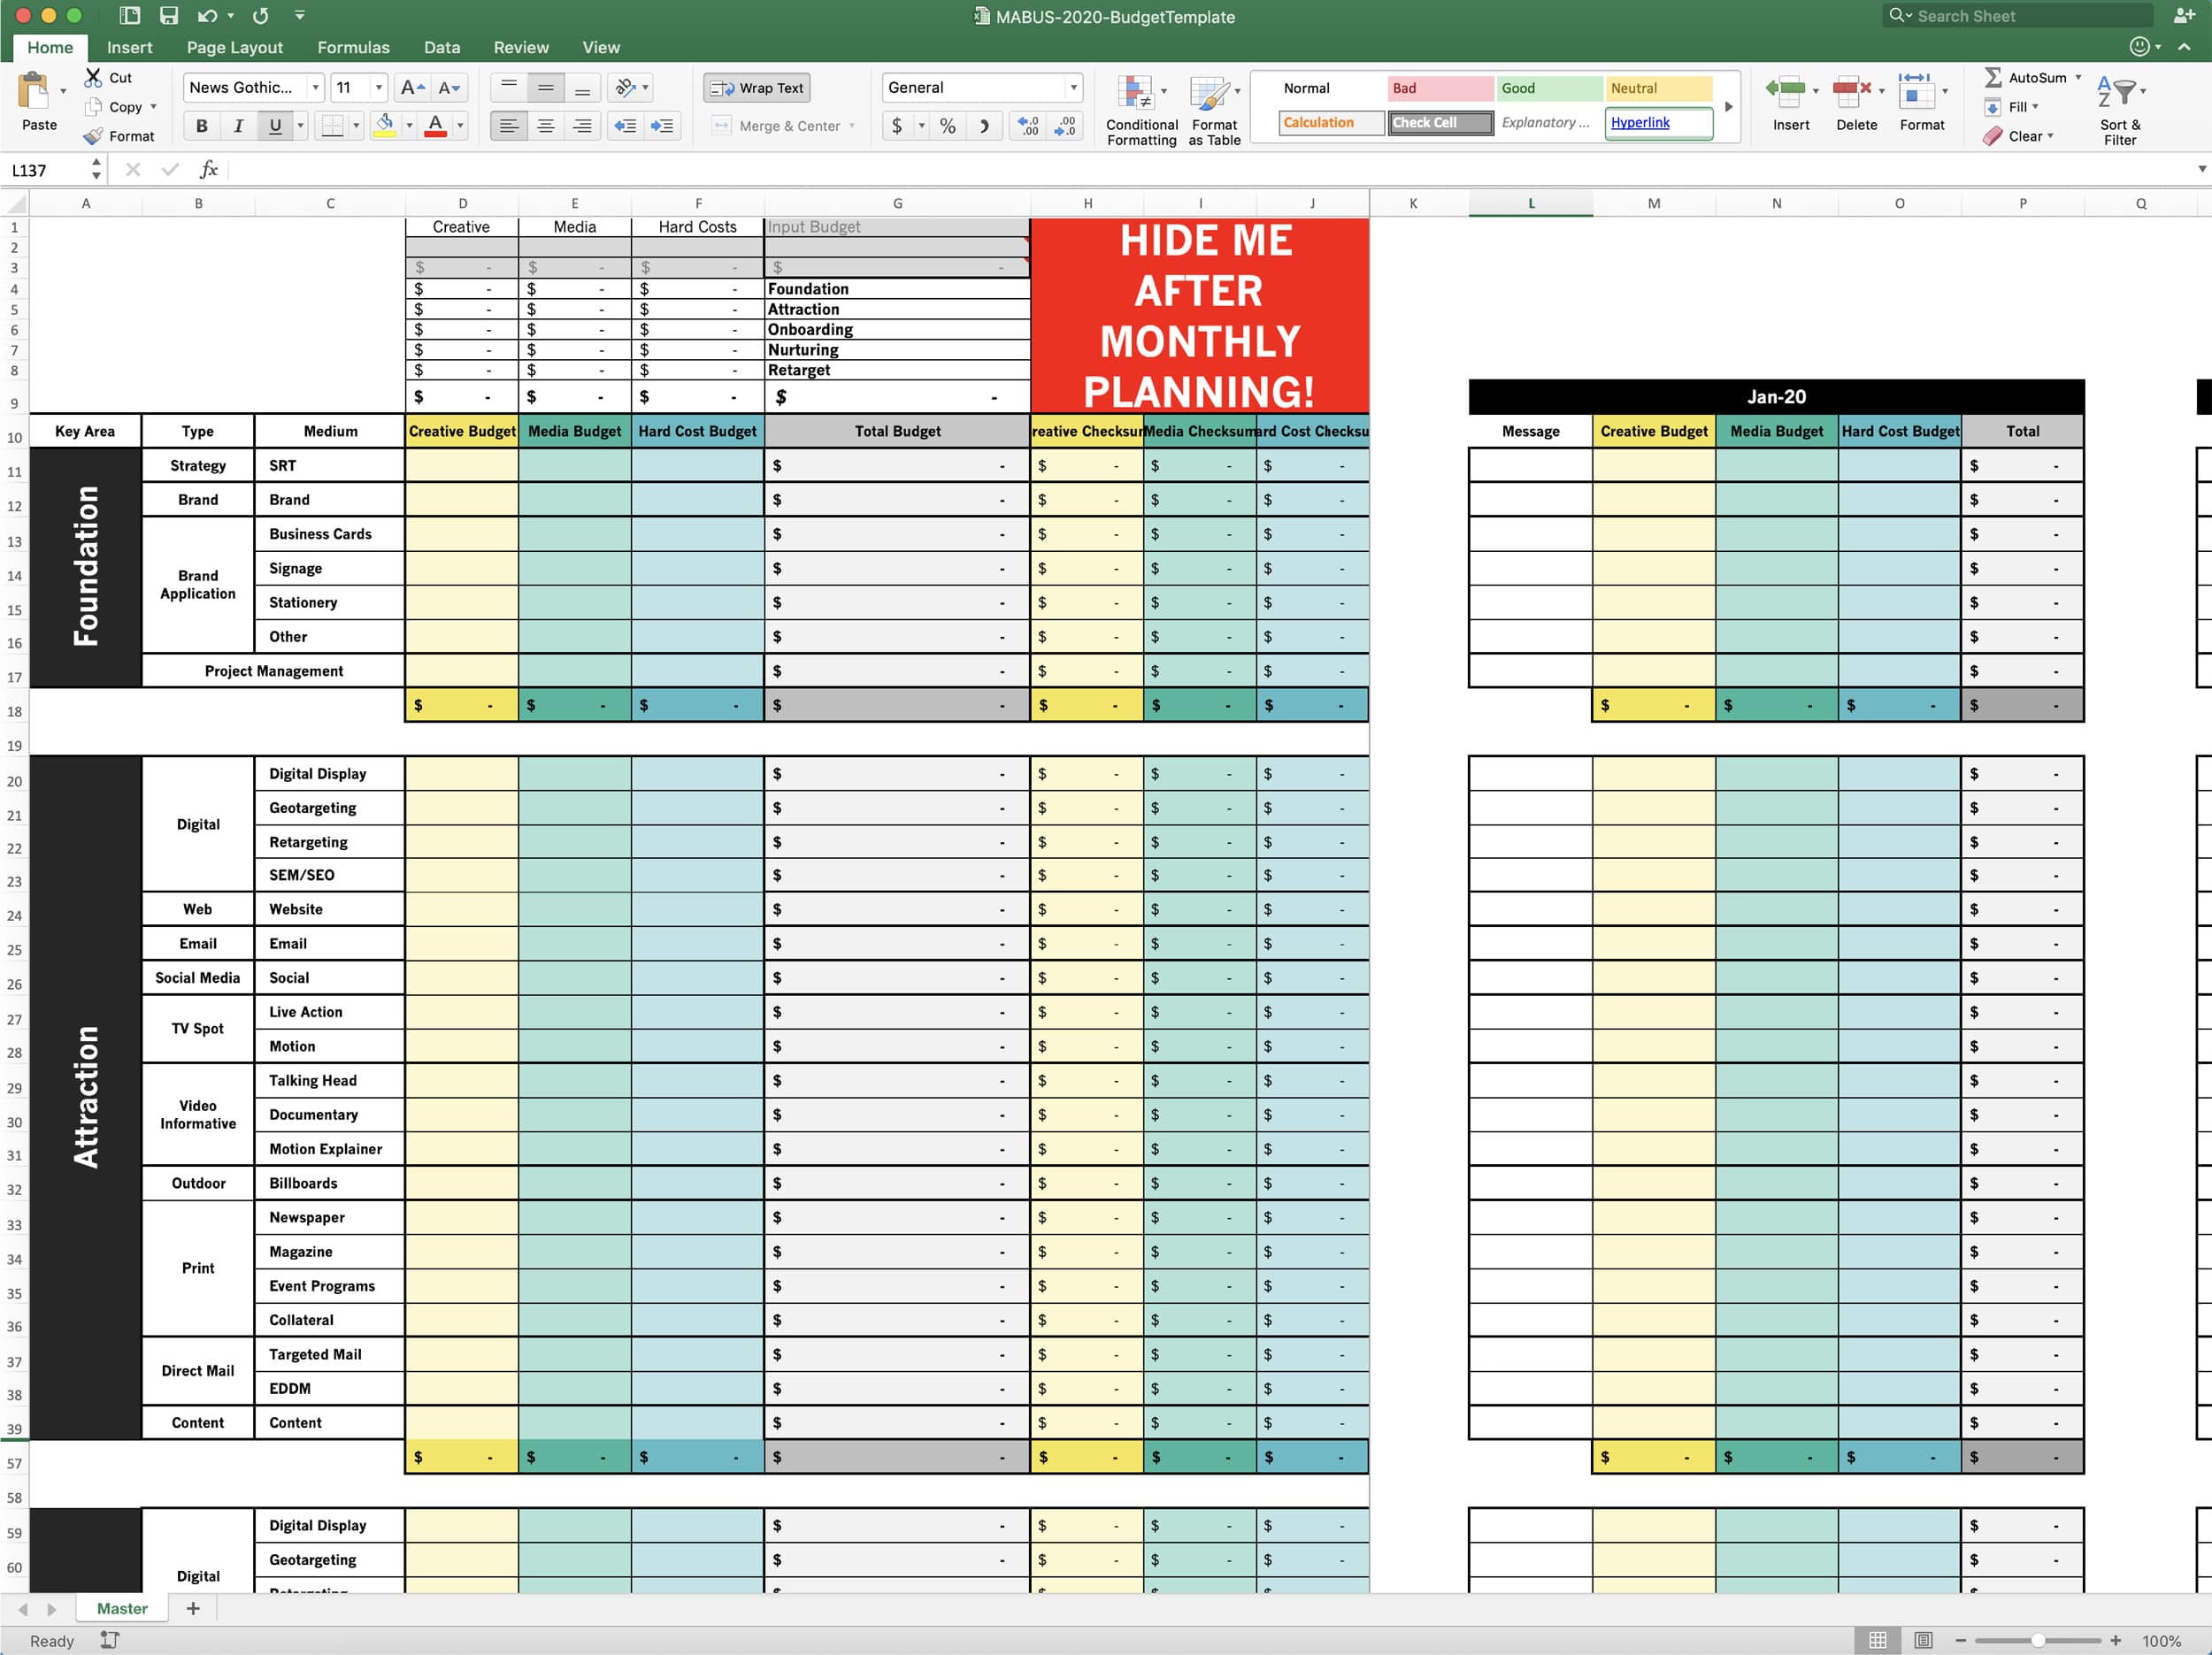
Don’t freak out. Budgeting is tough, and while the spreadsheet helps simplify the task, it’s not magic. We still have to consider many, many types of projects to help you make a workable budget. Since this document is prepopulated with many project types, it can seem daunting, but we’ll address this issue first.
We designed this budgeting spreadsheet to help you align your budget with your overall marketing strategy. Everything’s grouped by the five key areas in our client acquisition and retention process. Read more about the key areas HERE or watch the video at the top of this page to learn more.
Within those key areas, we have included many projects. You will likely only use a small number of these projects in your final budget.
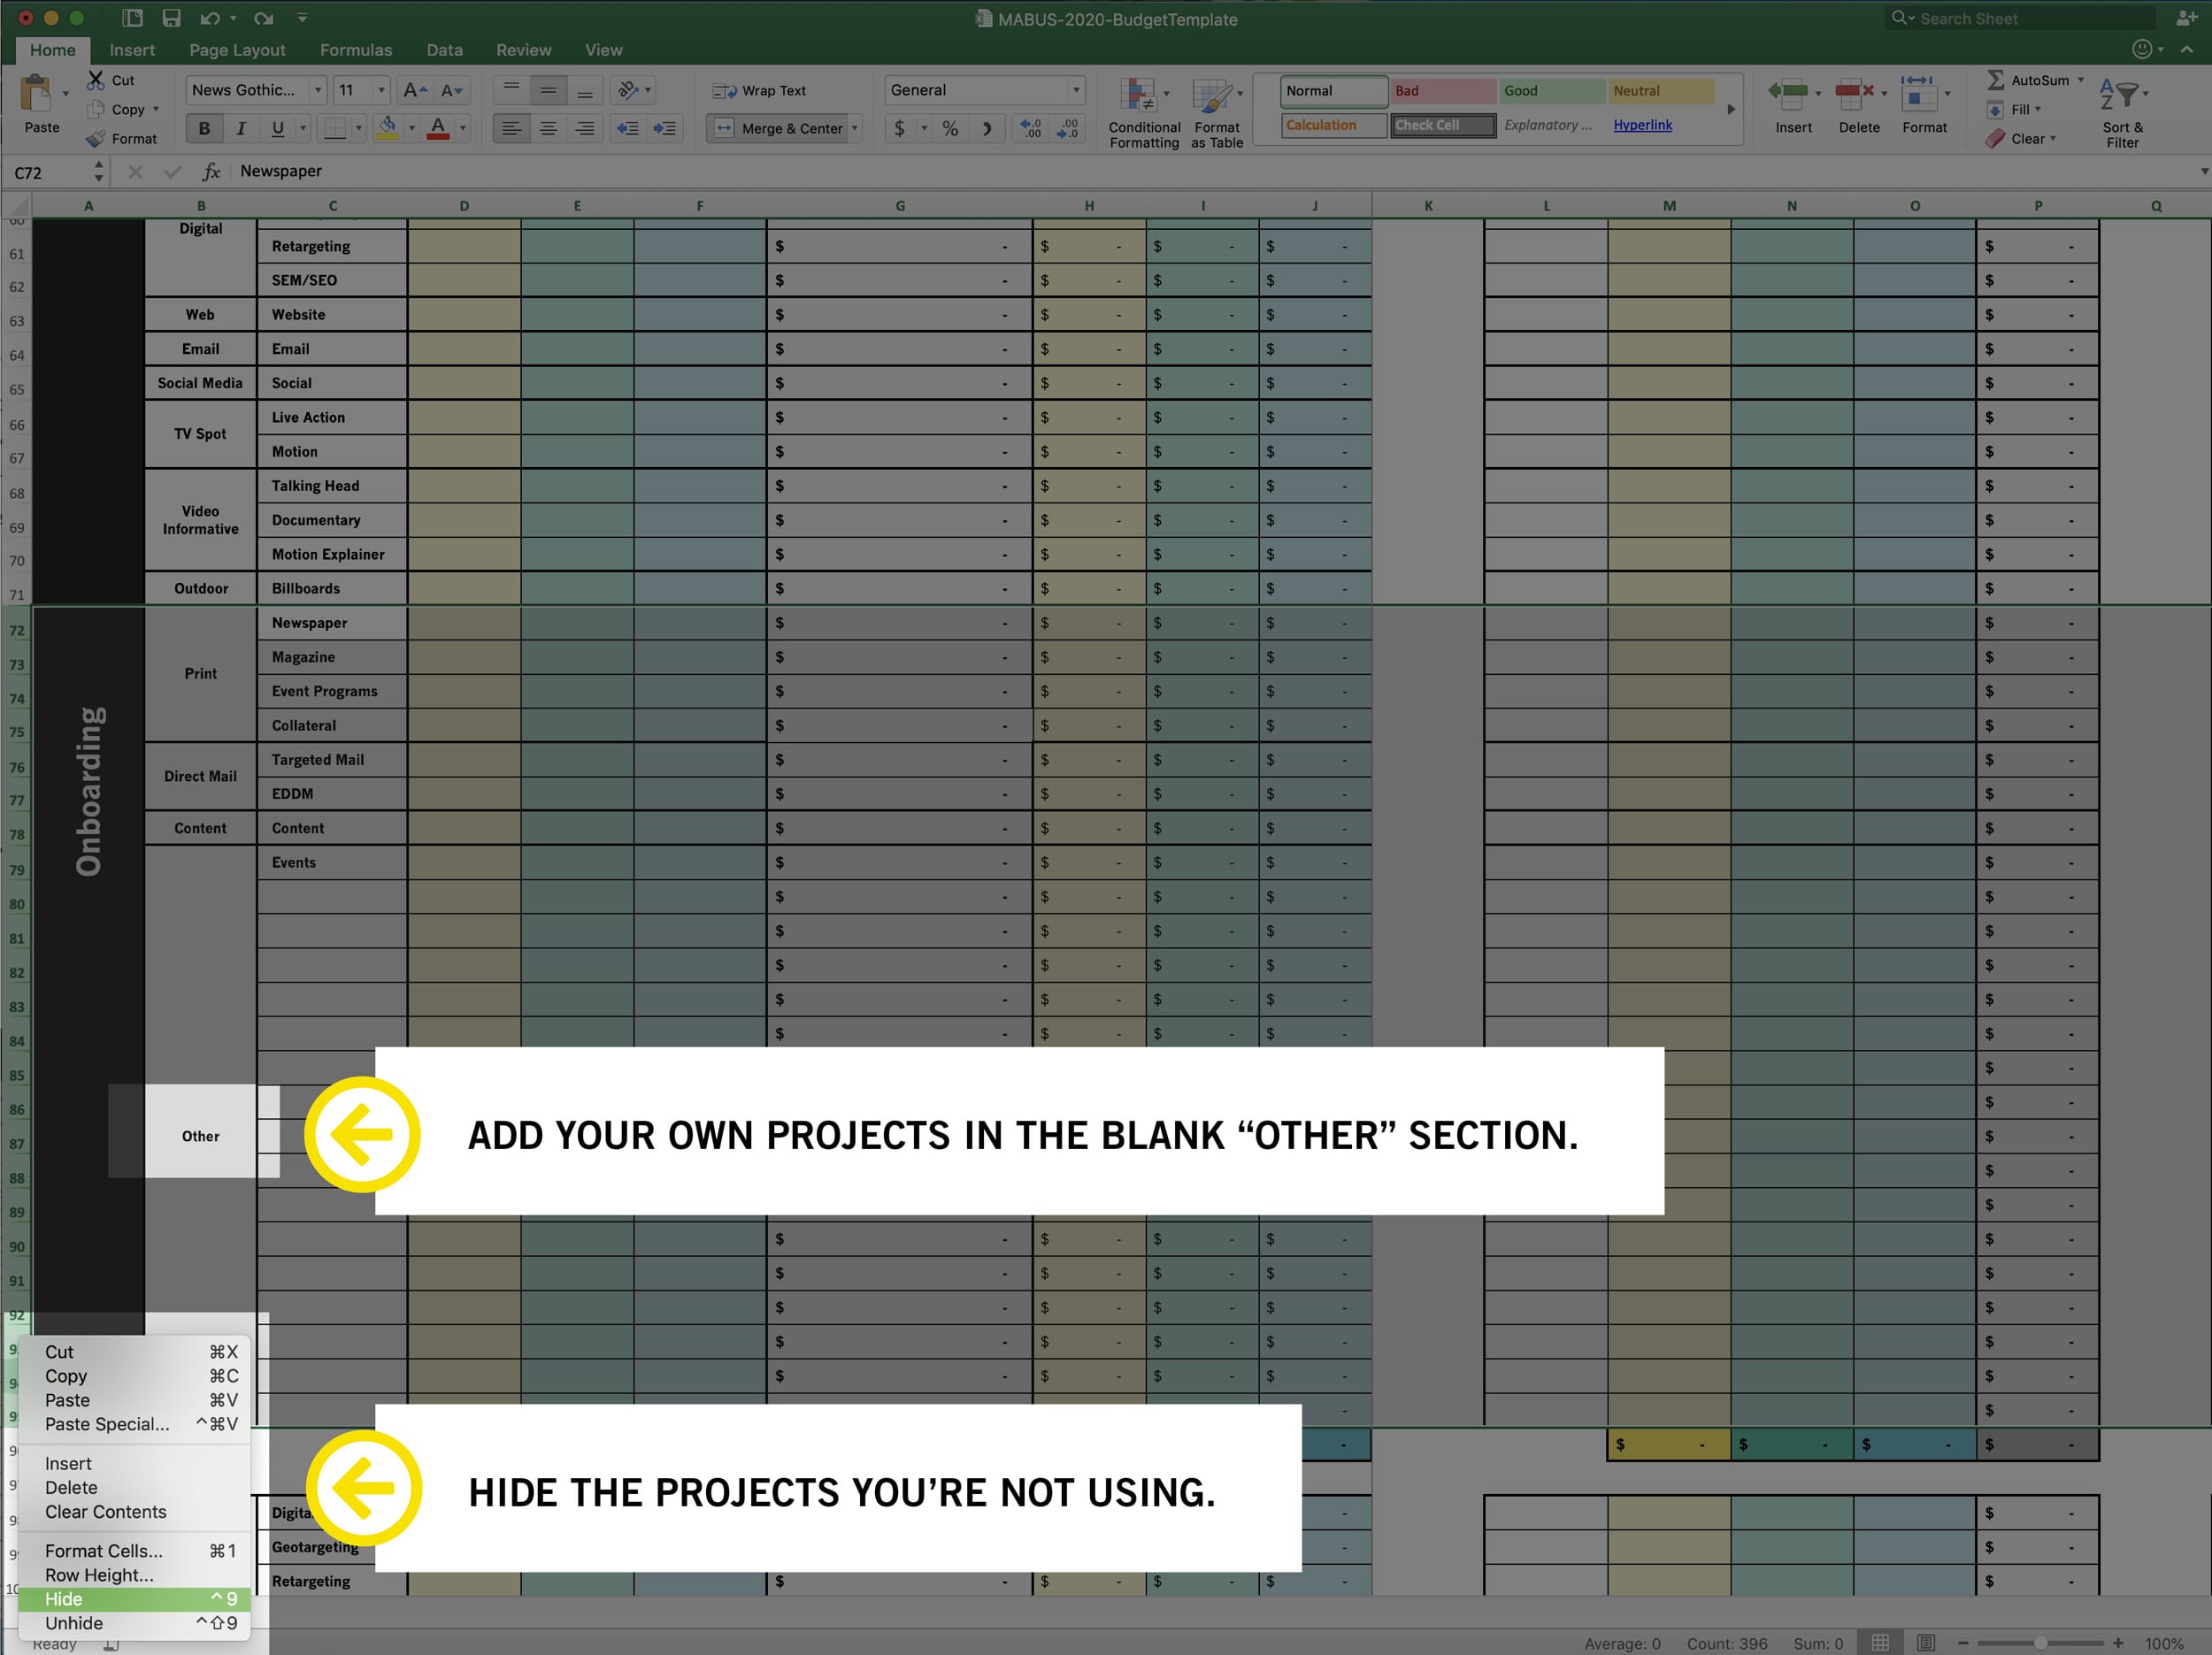
Your first task is to hide rows for projects that you will not use in your budget.
This is a great exercise to focus your efforts. To hide a row, simply right click on the number of that row and click “hide.” You can select and hide multiple rows at once.
We have also included a blank section of “Other” cells that you may populate yourself or hide.
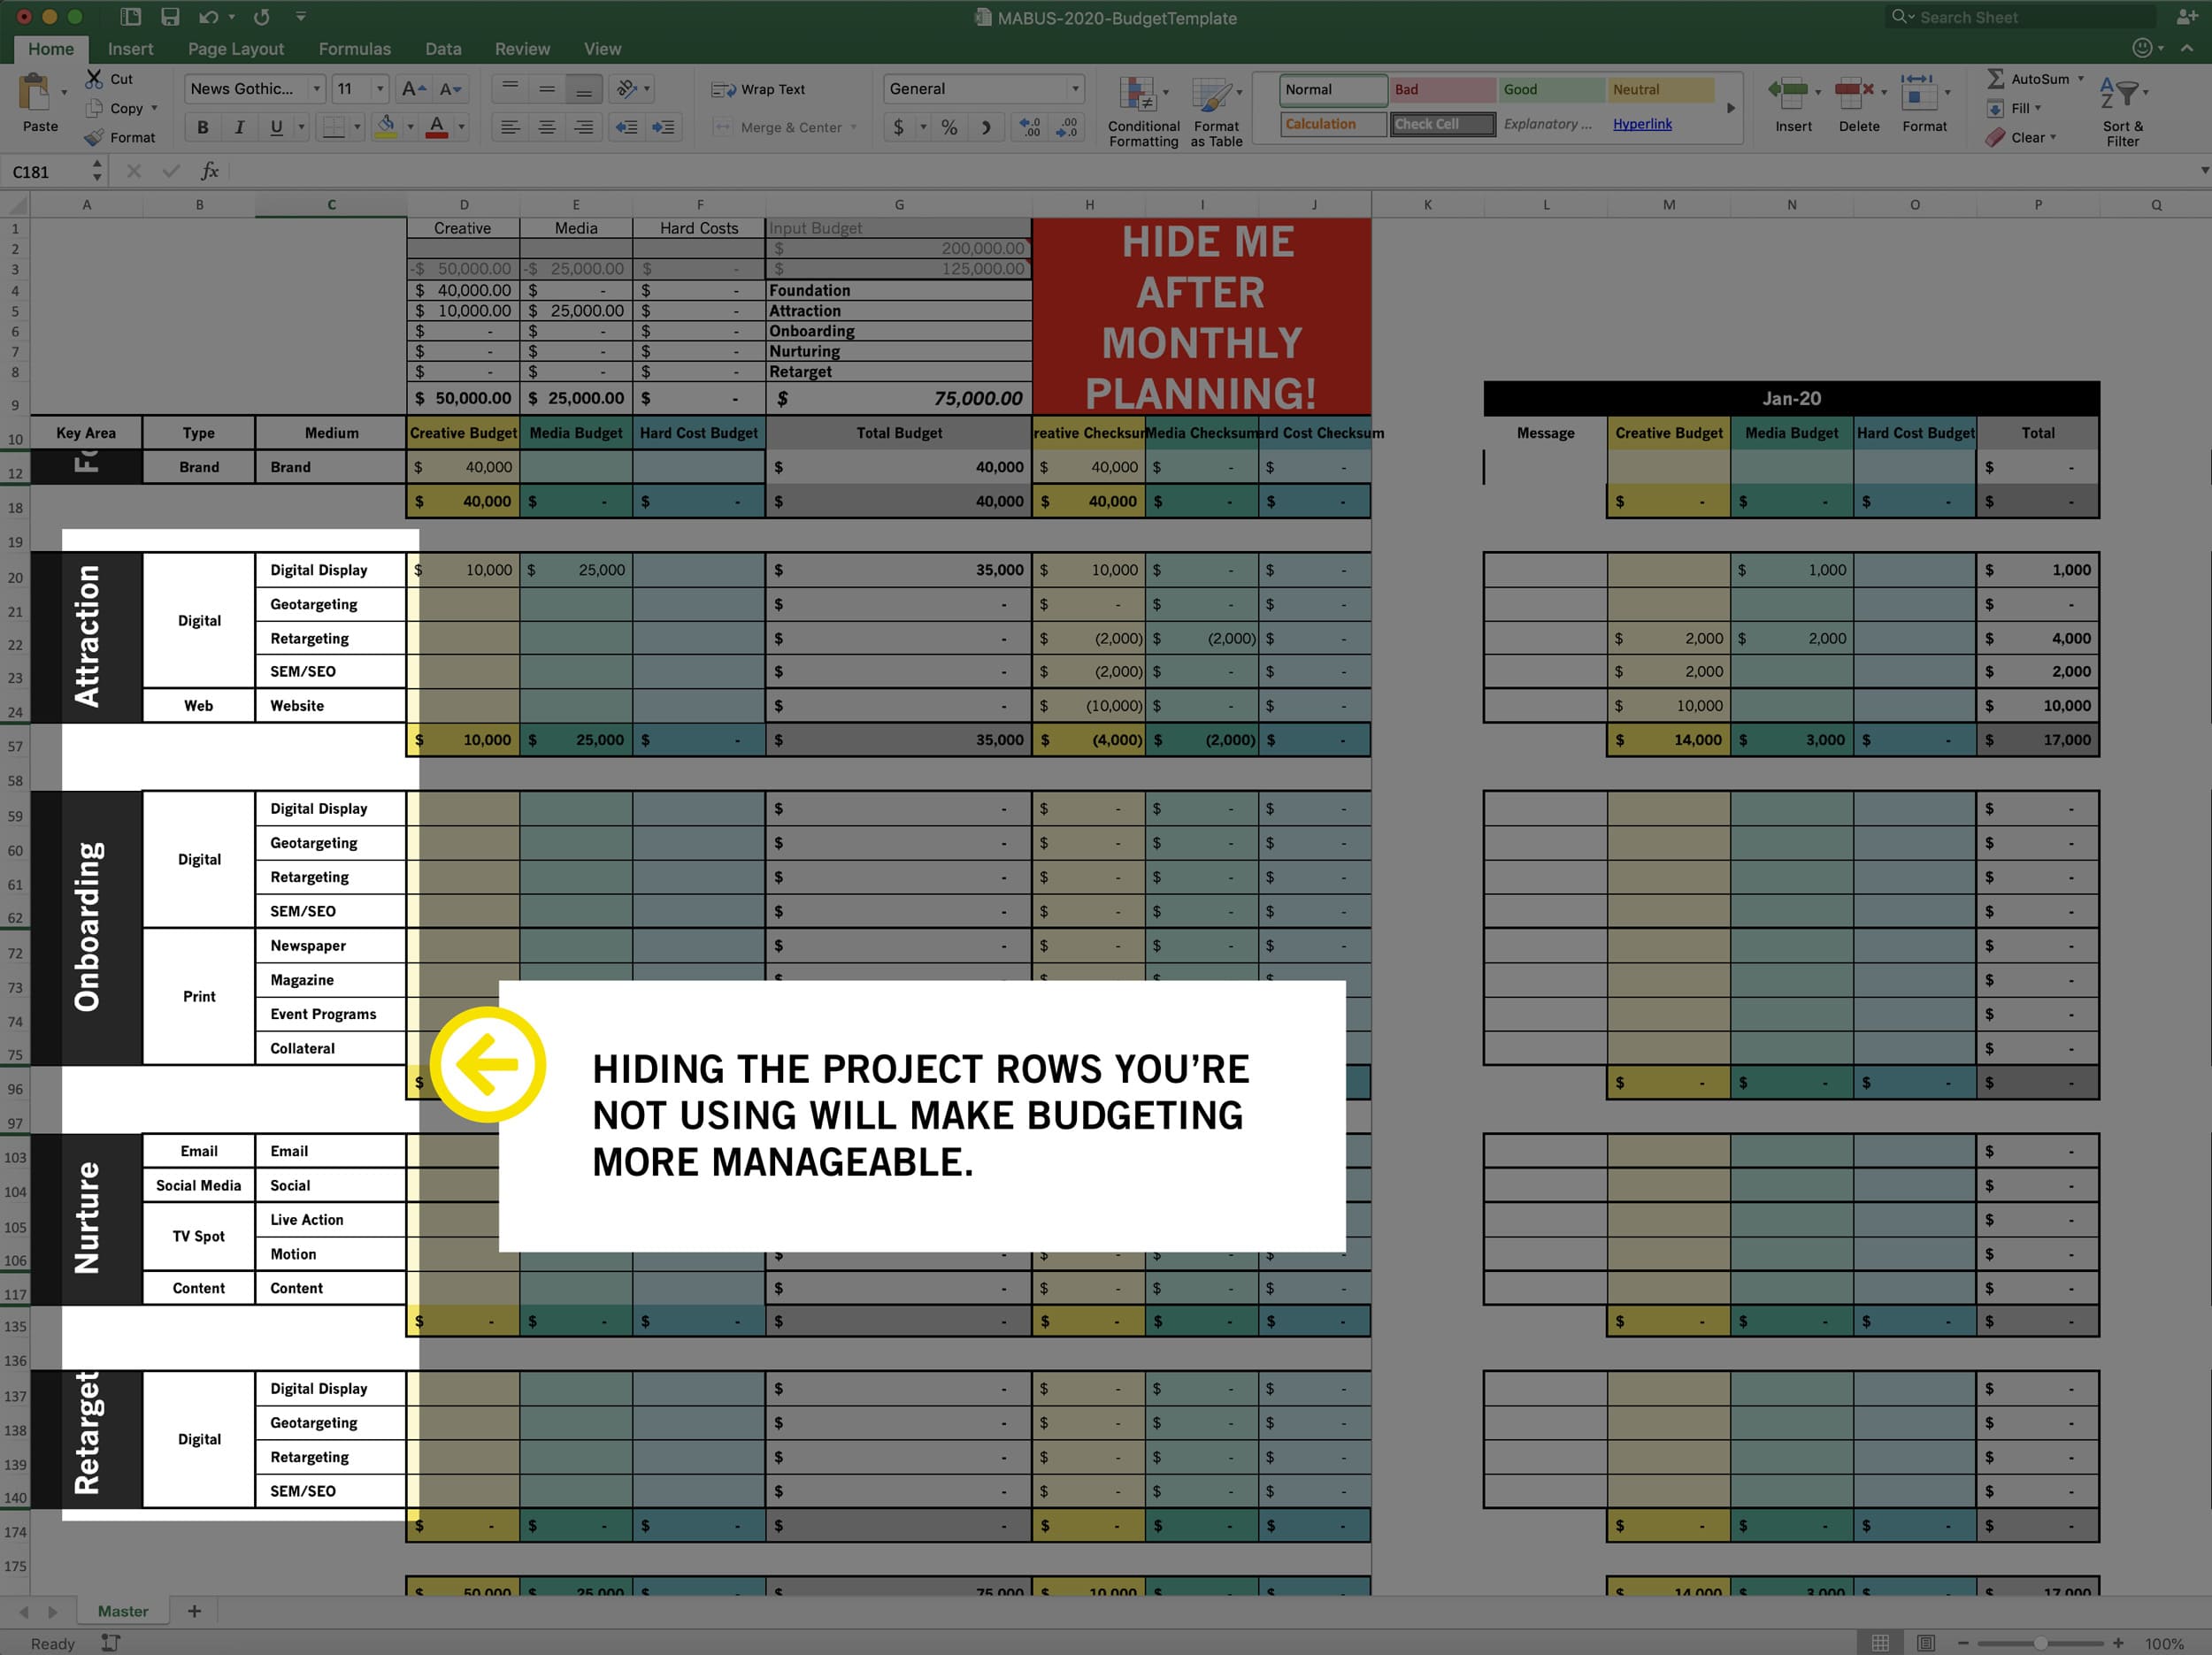
Your spreadsheet should now look a bit more manageable.
You can unhide/hide cells at any point in this process. This will give you flexibility in budgeting.
Keep in mind you need to clear any cells before hiding the row, or these dollar amounts will be included in your totals even though they are hidden.
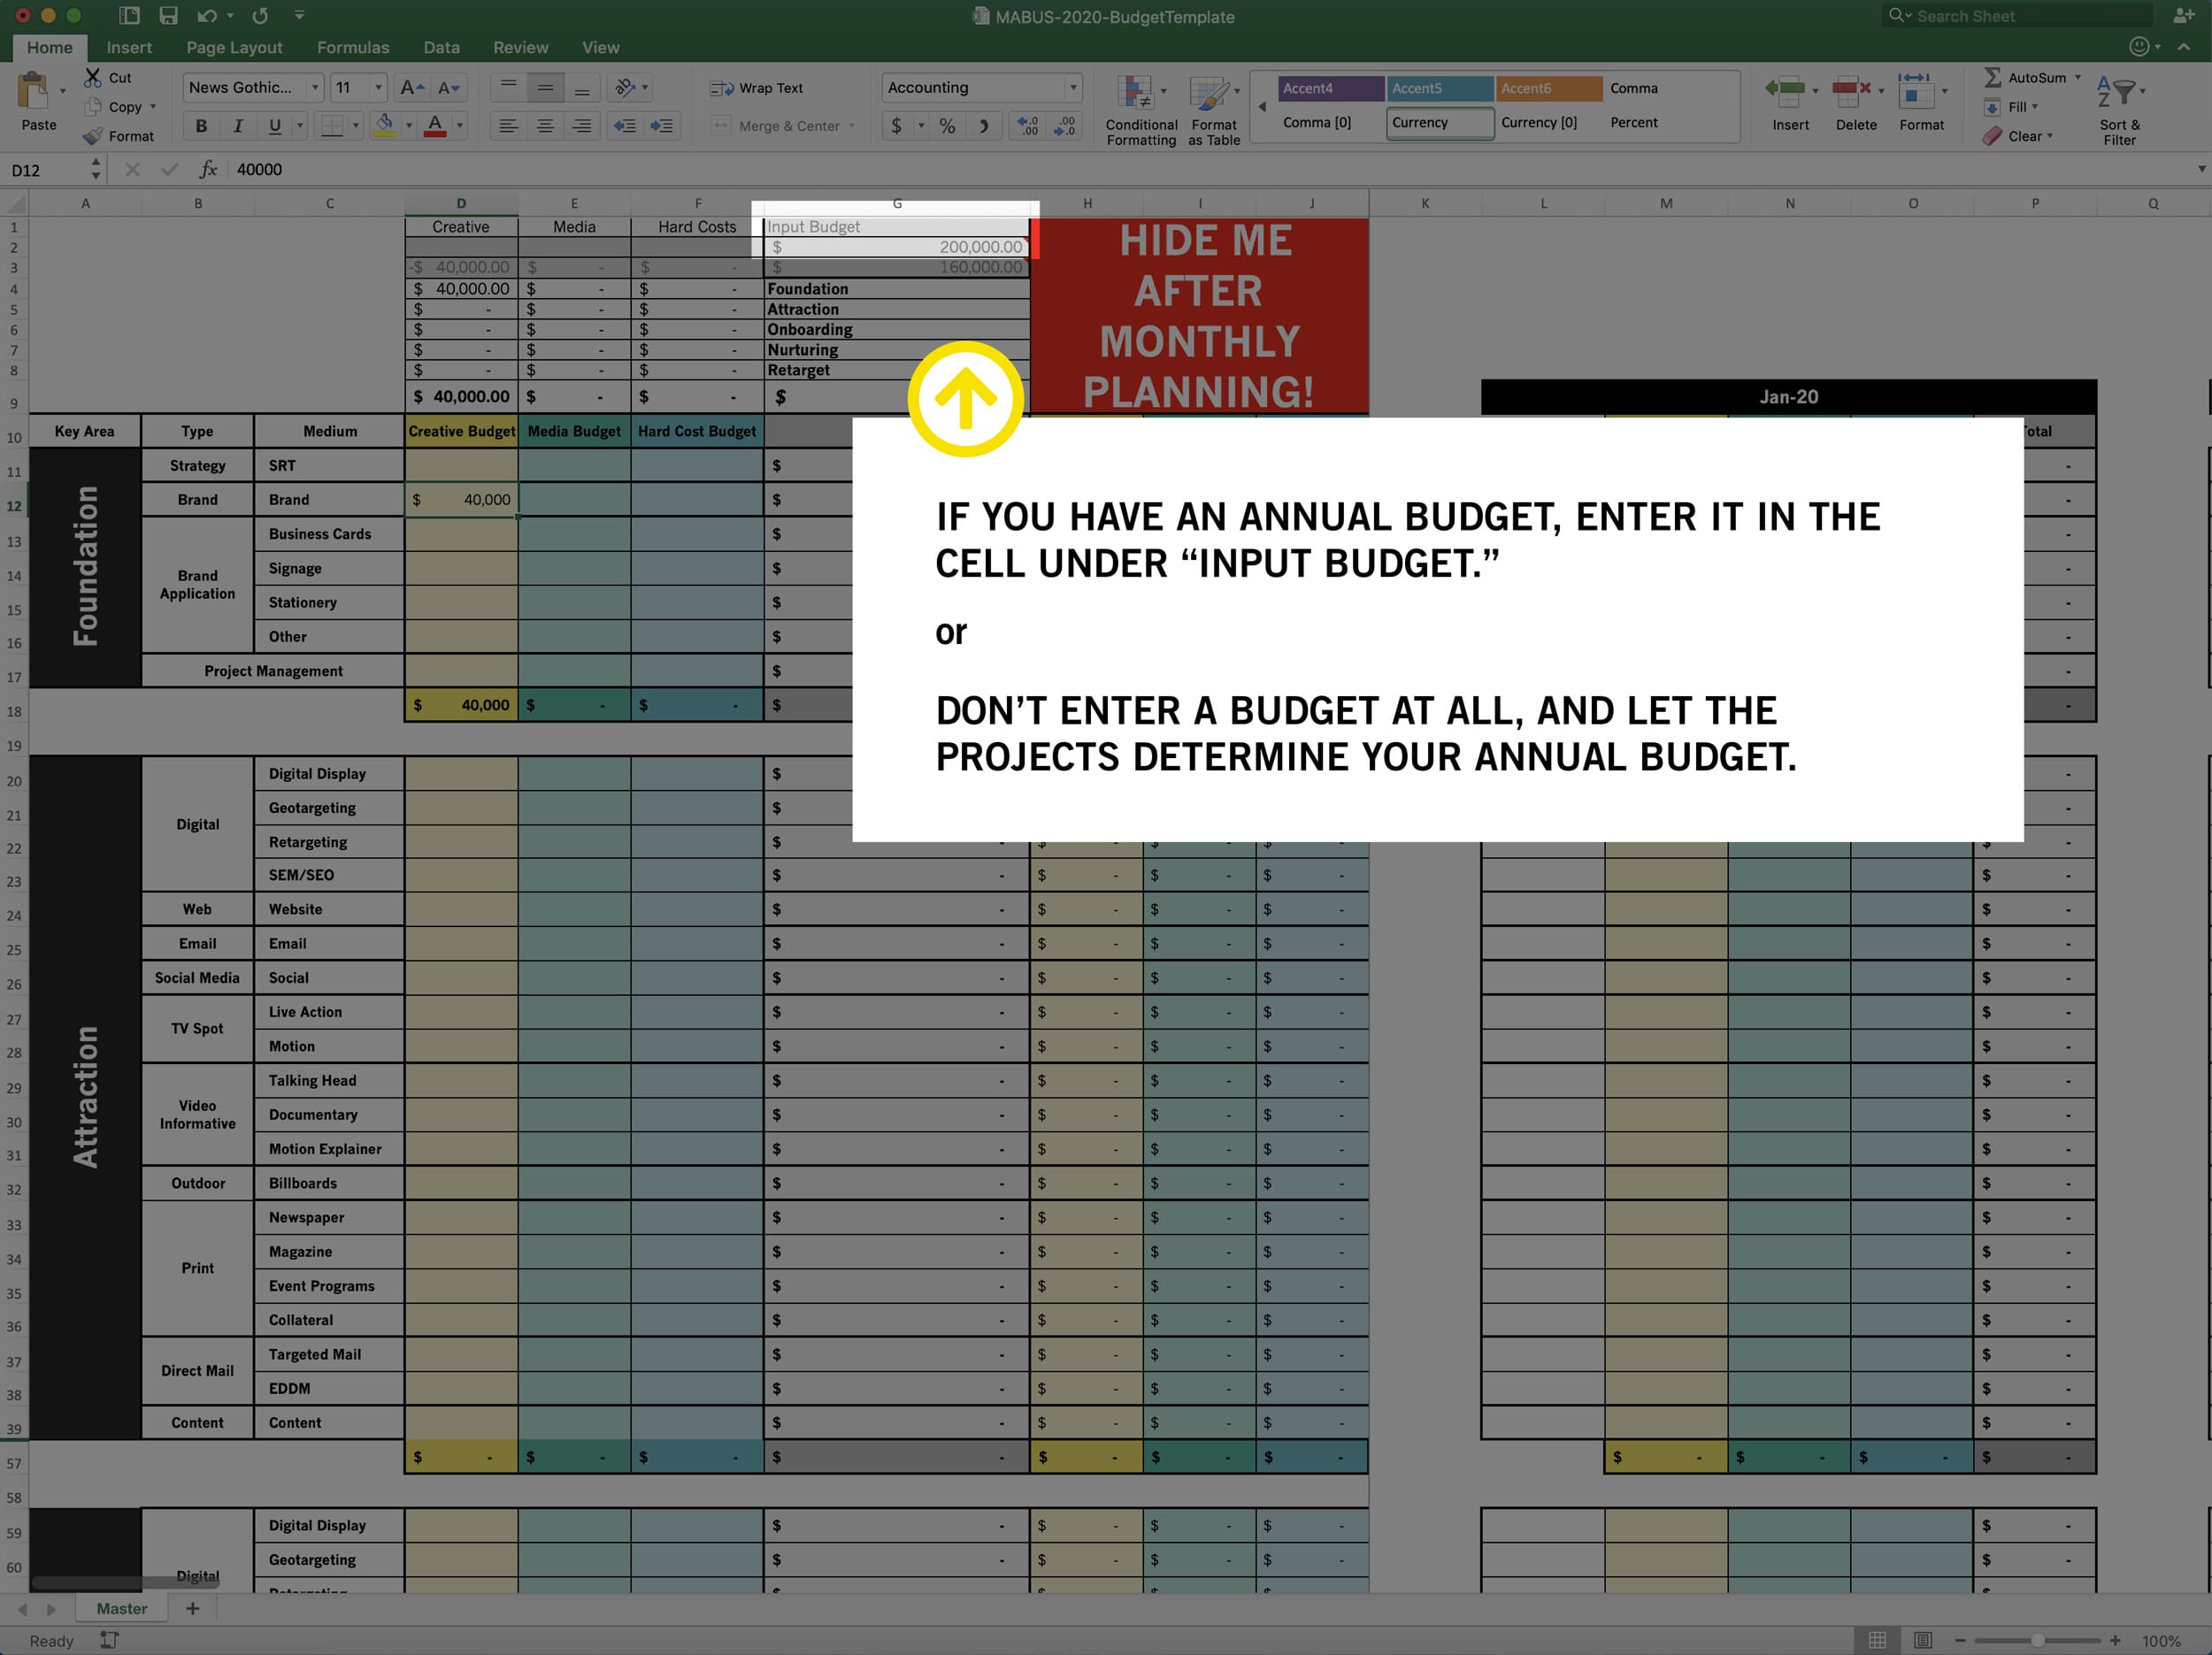
Enter your overall annual budget amount here. This will help you as you allocate budget amounts to individual projects, letting you know how much budget remains.
You do not have to enter a number here. You may choose to price out the desired projects and let this total determine your annual budget.
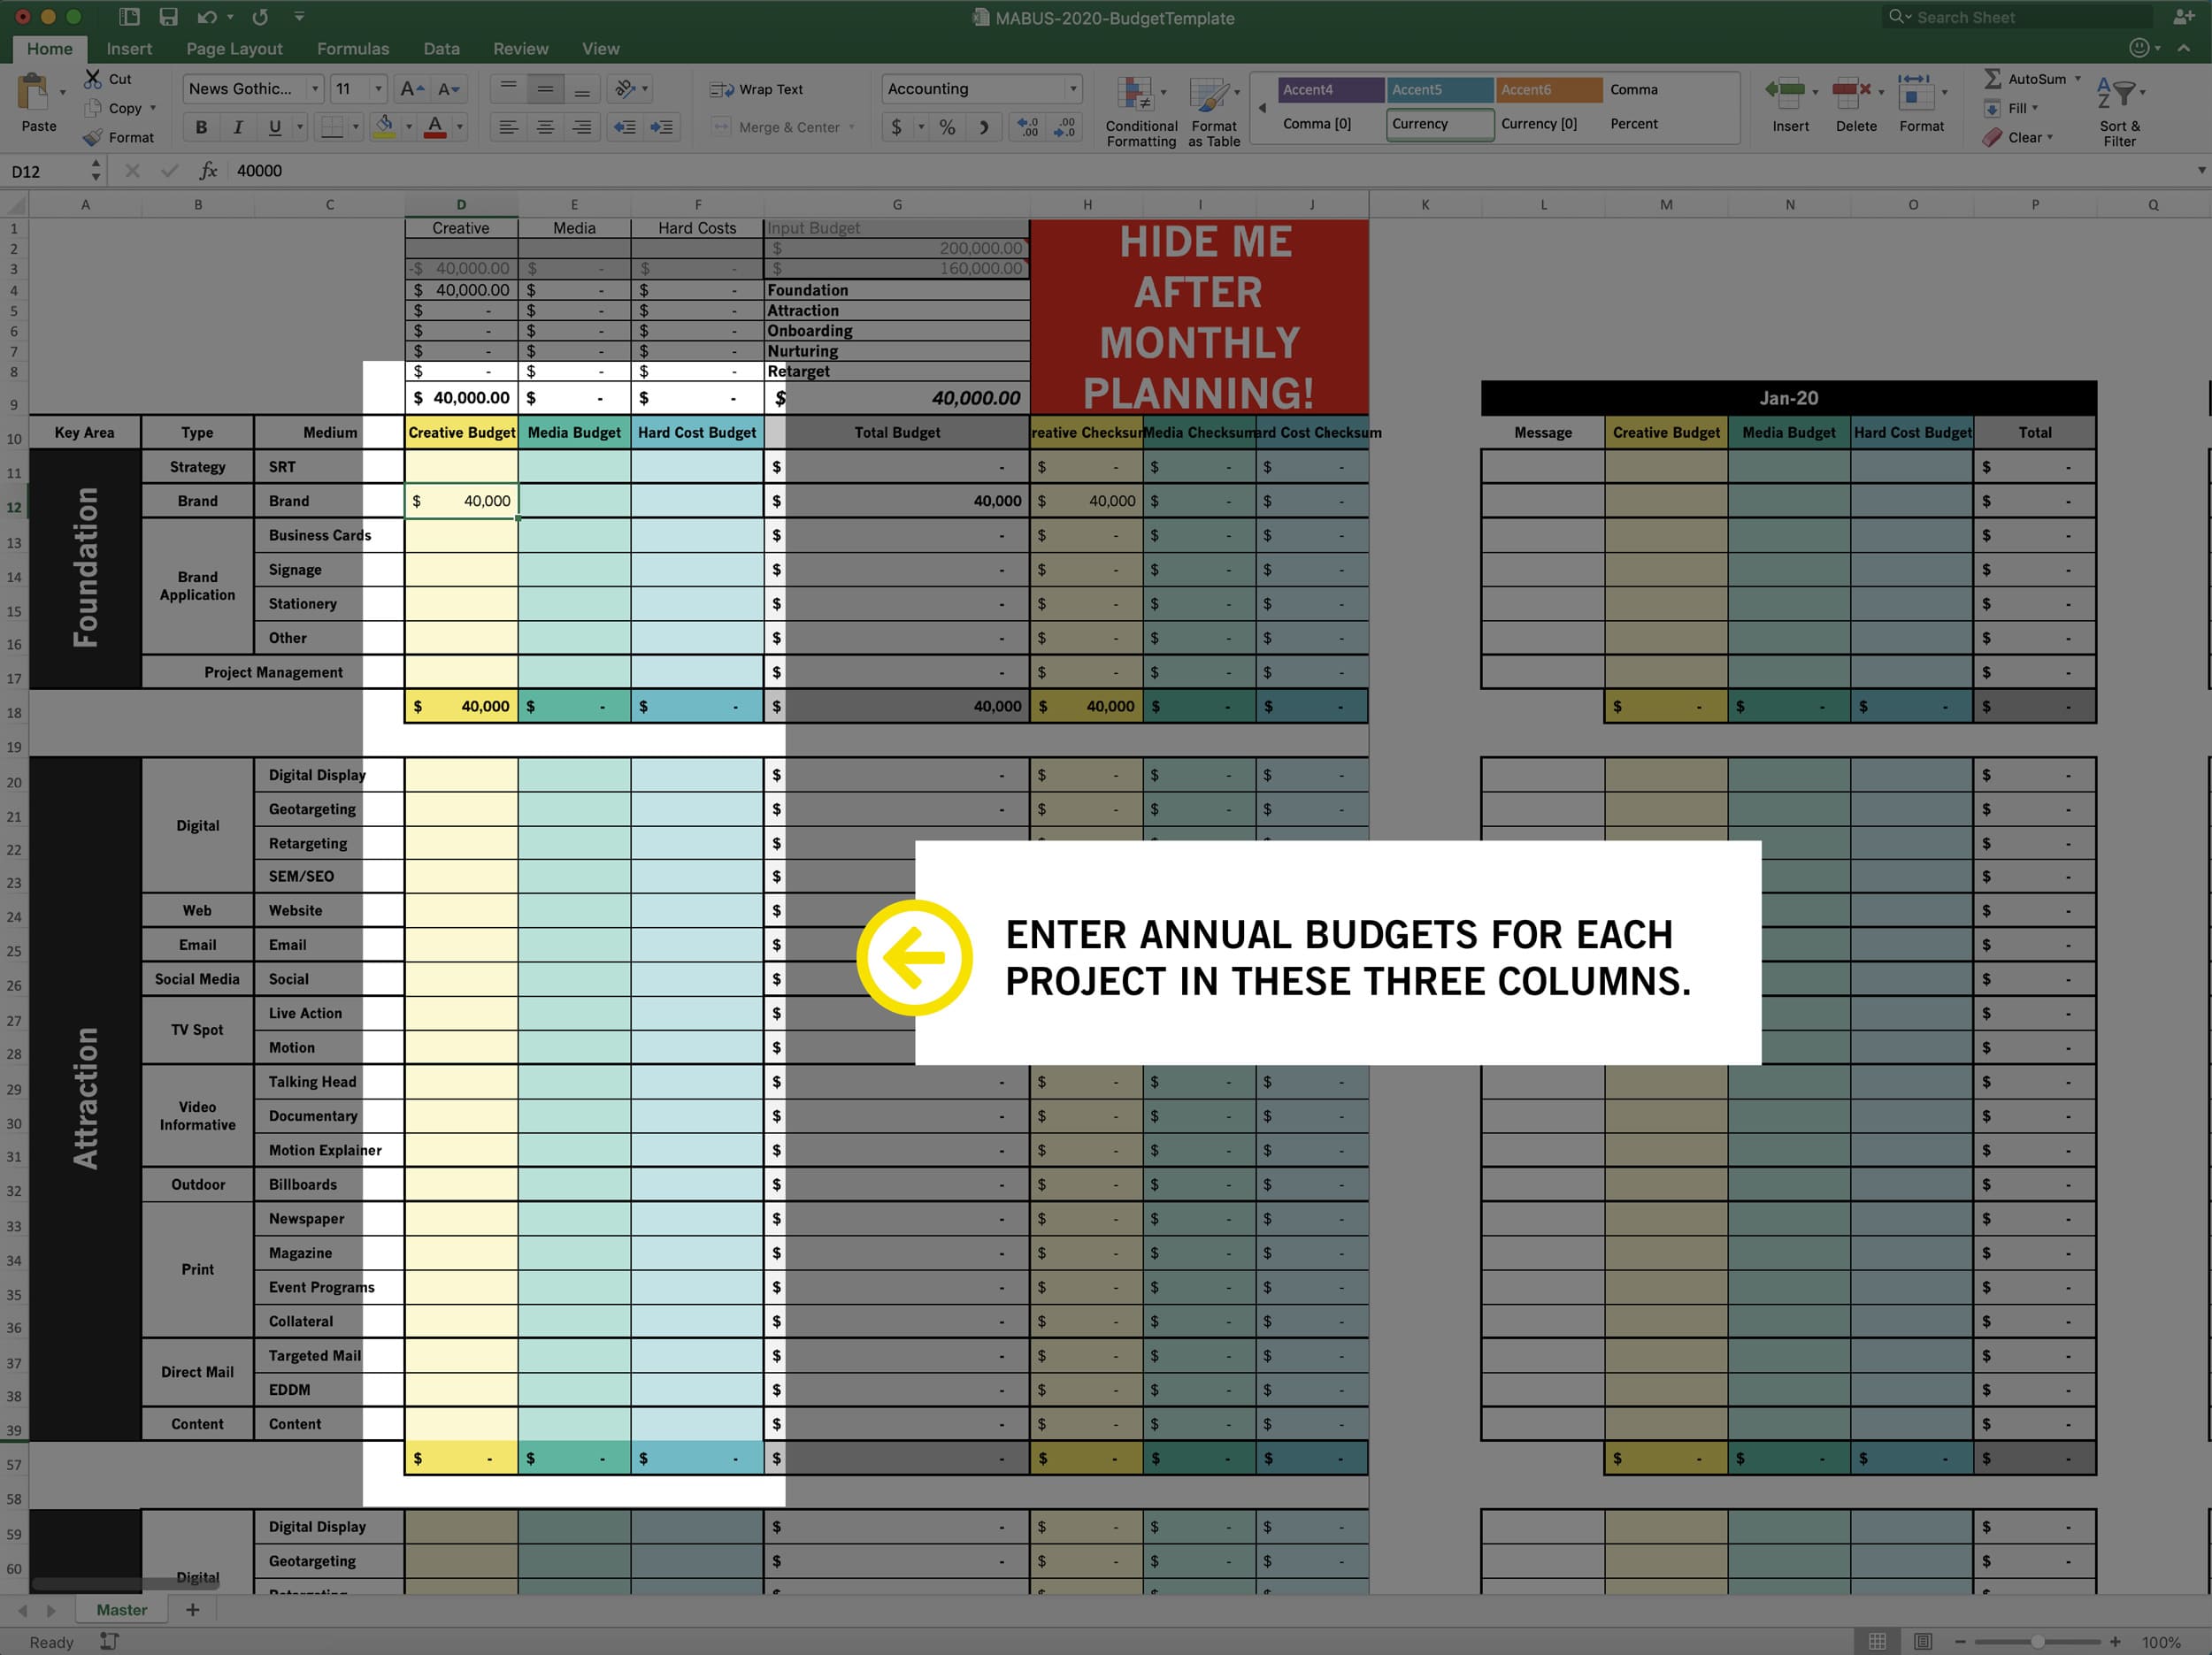
Now, begin entering individual, annual budgets for each project. These are allocated over time in a future step. Add amounts for each item as it applies to creative, media placement and hard costs. Keep in mind, not everything will have a media or hard cost.
Notice that each amount entered deducted from the total. This allows you to track your total spending as you add pricing for each item.
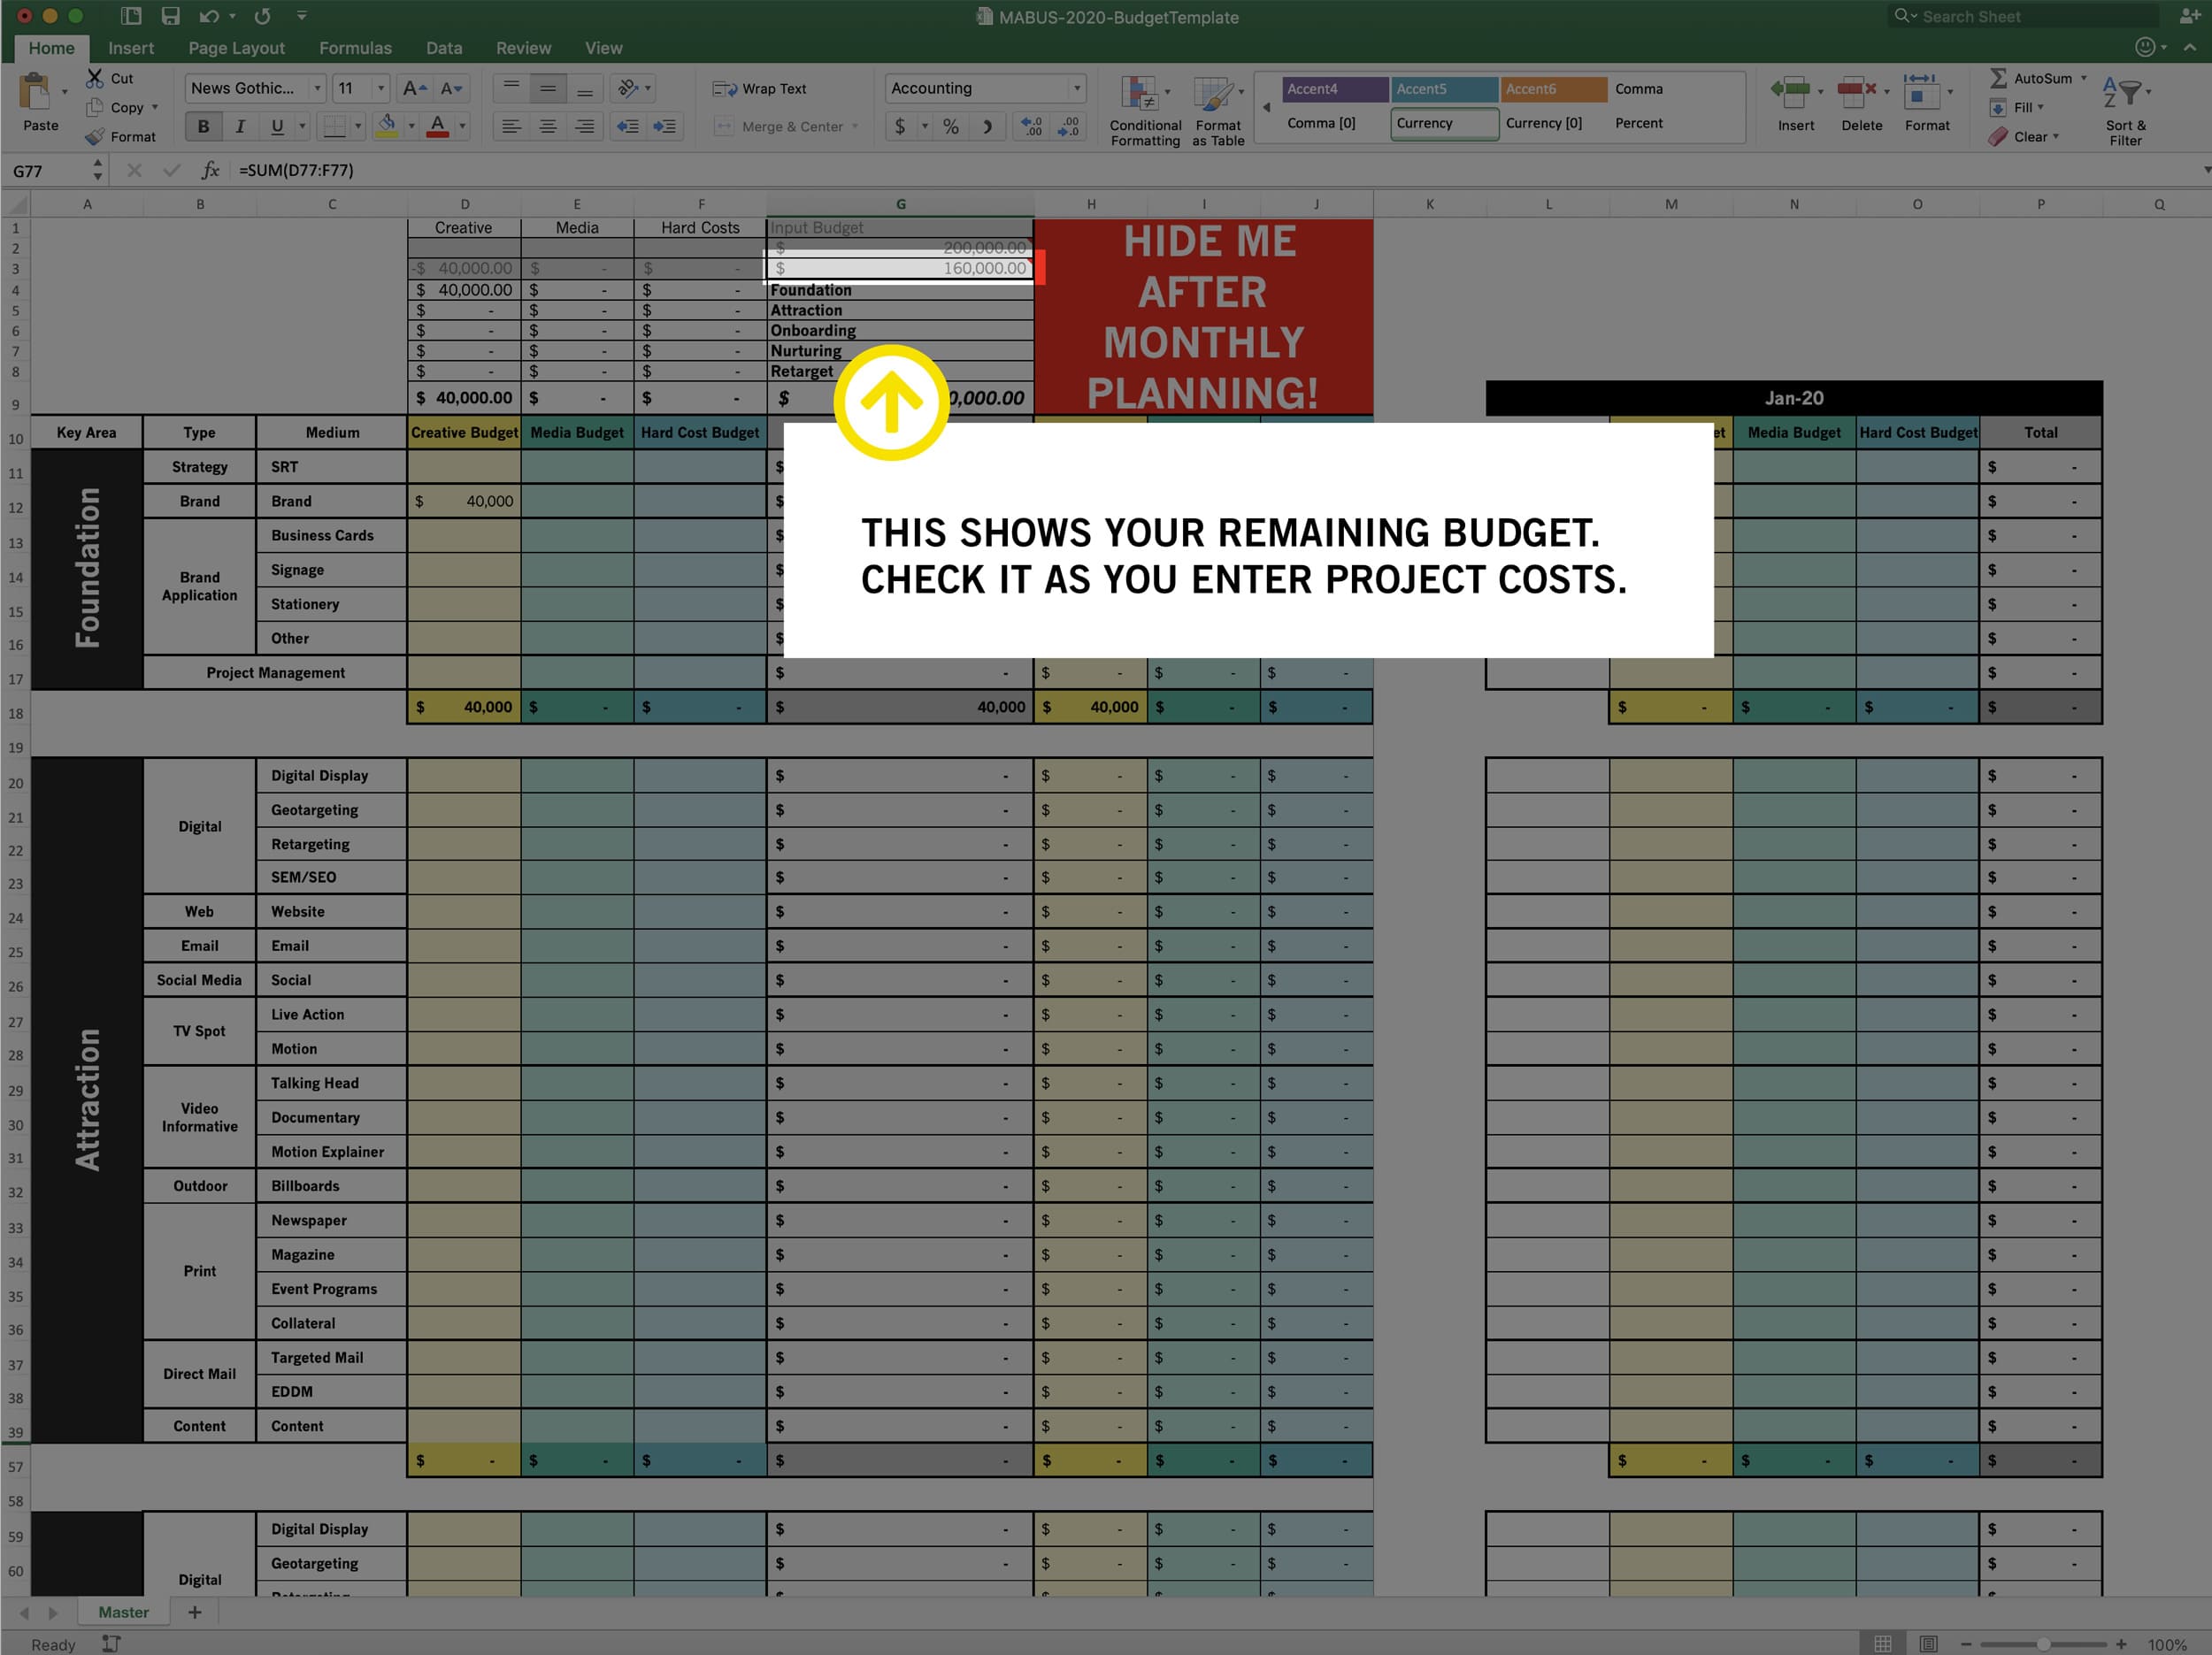
Once you have entered budgets for each appropriate project, check your total remaining budget. This example balances to zero, but you might have a number left here.
Red numbers = over budget amount.
Yellow numbers = under budget amount, which is available to spend on the project.
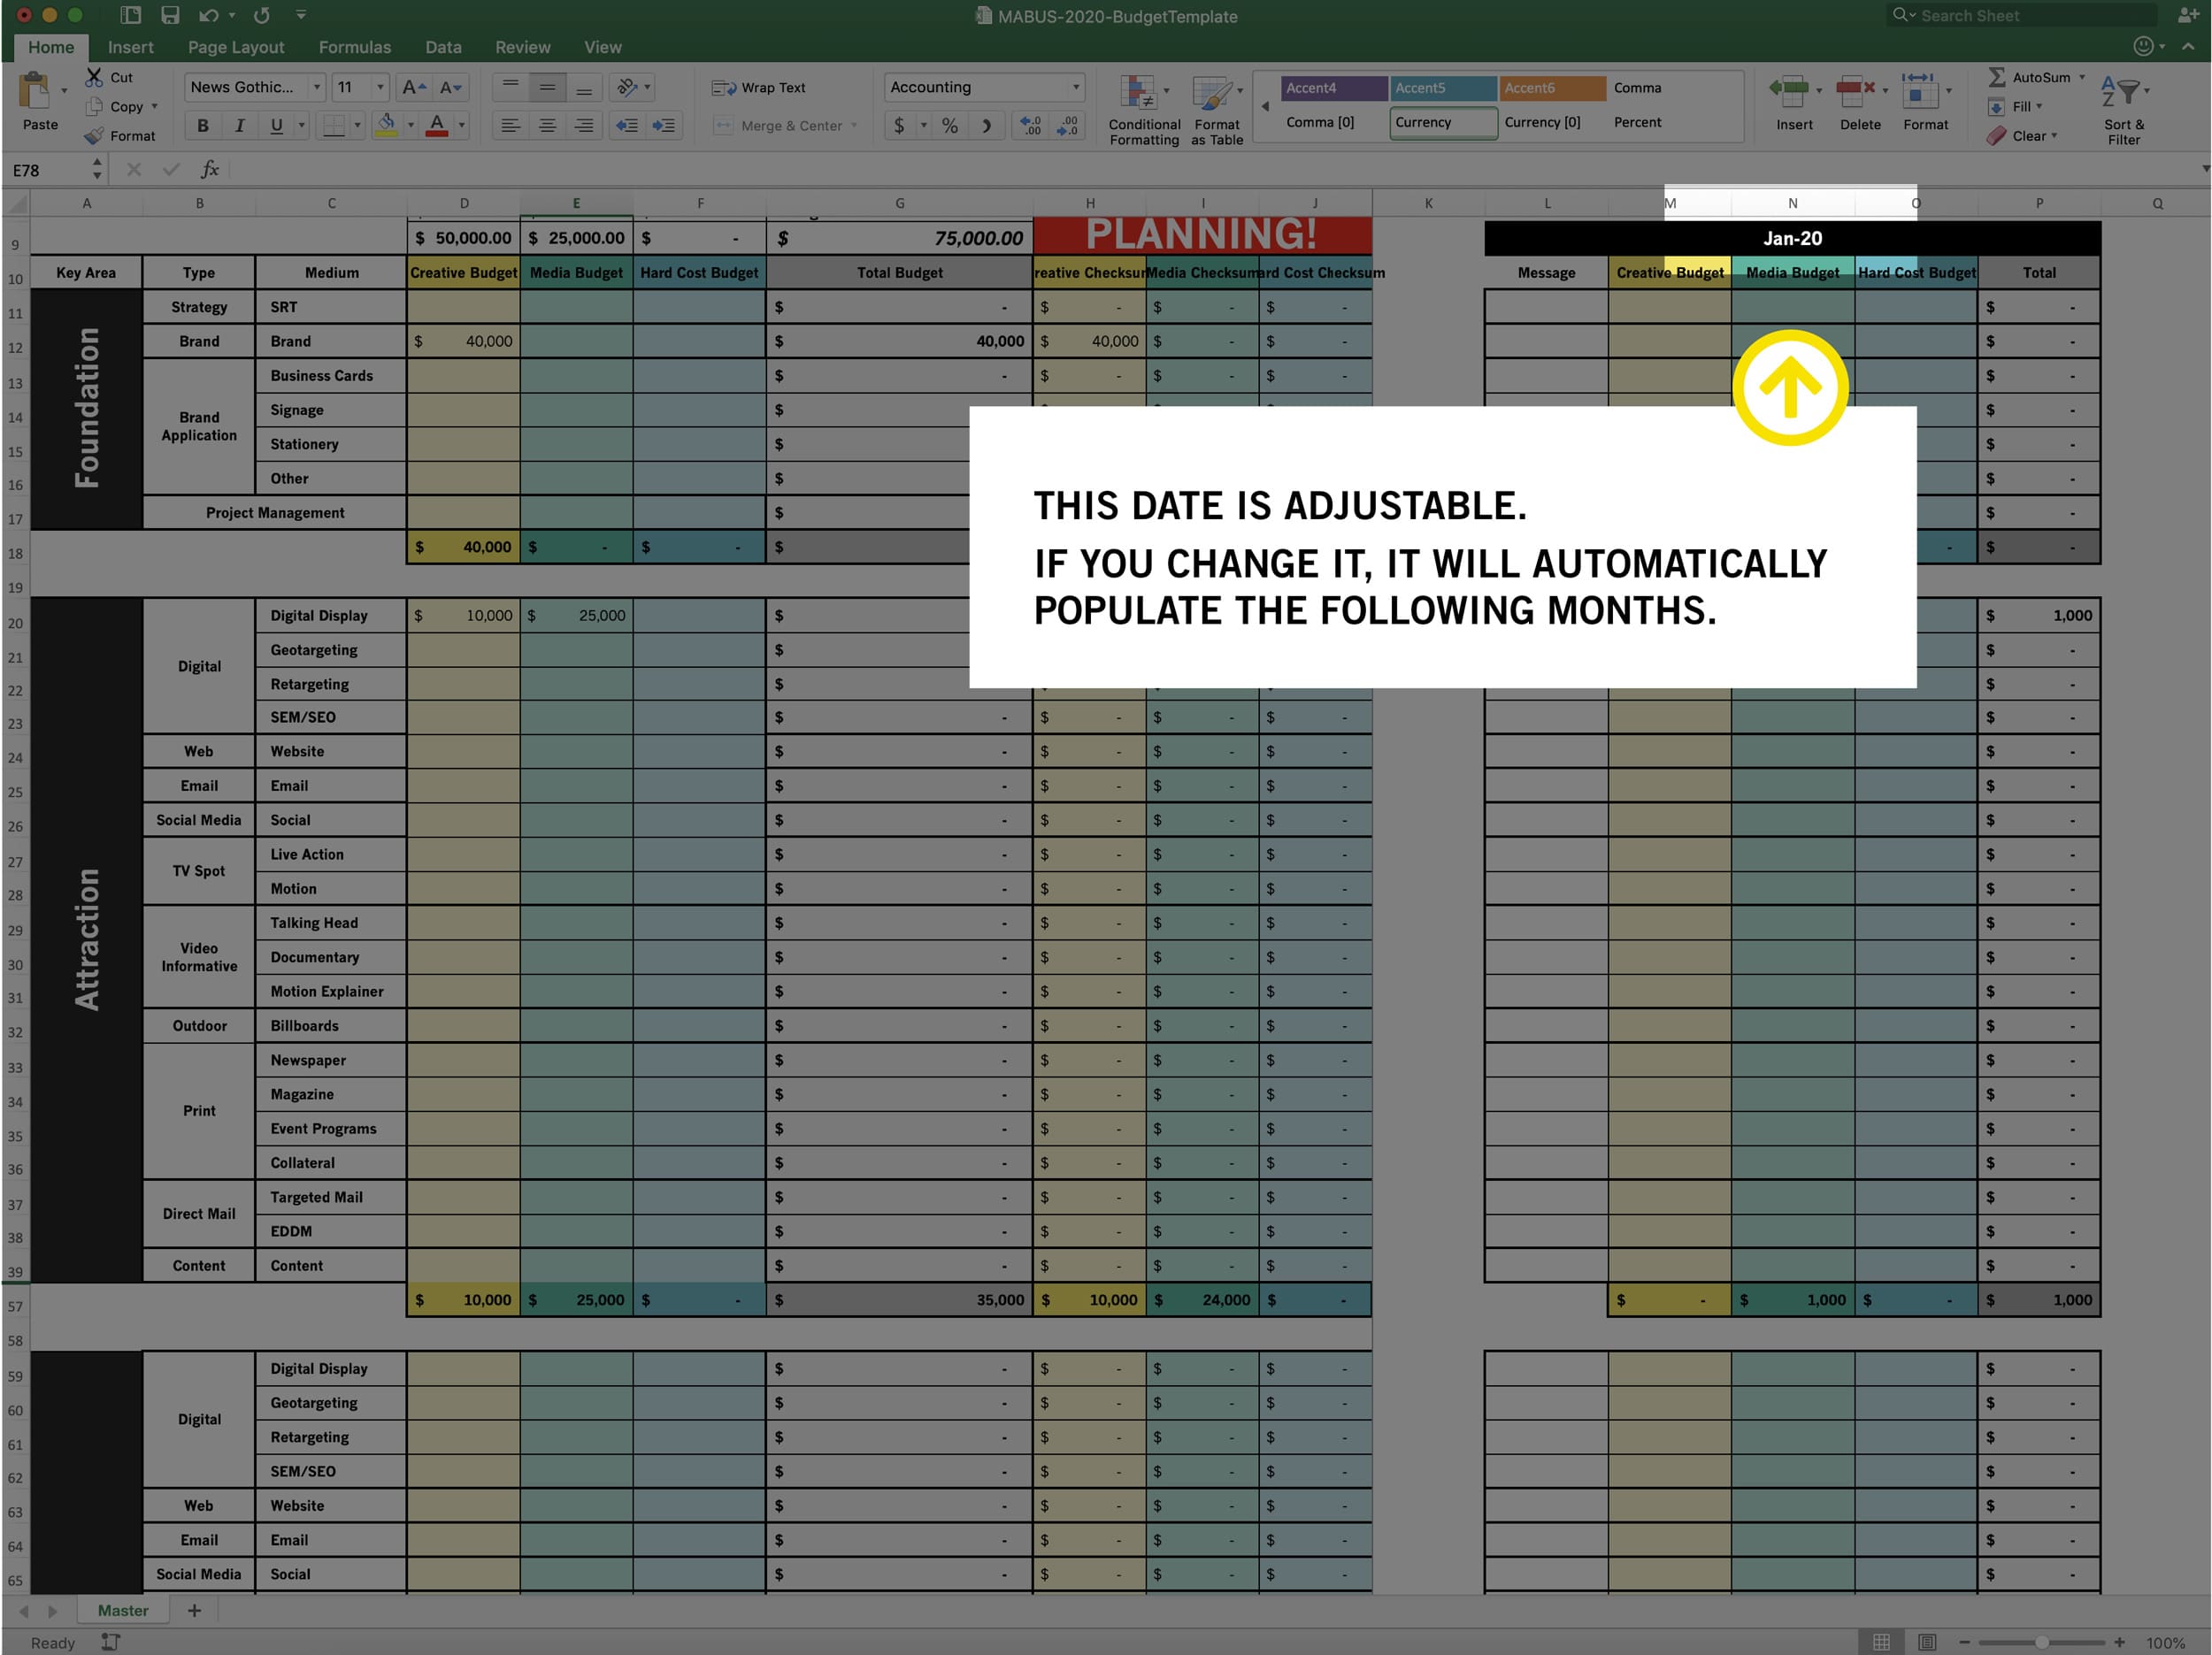
Next, click on the header of the first monthly allocation column. It should read “Jan-19.”
You may adjust this for any budget by changing the year or month, which will populate the rest of the year. We only recommend this when your fiscal year does not follow the calendar year.
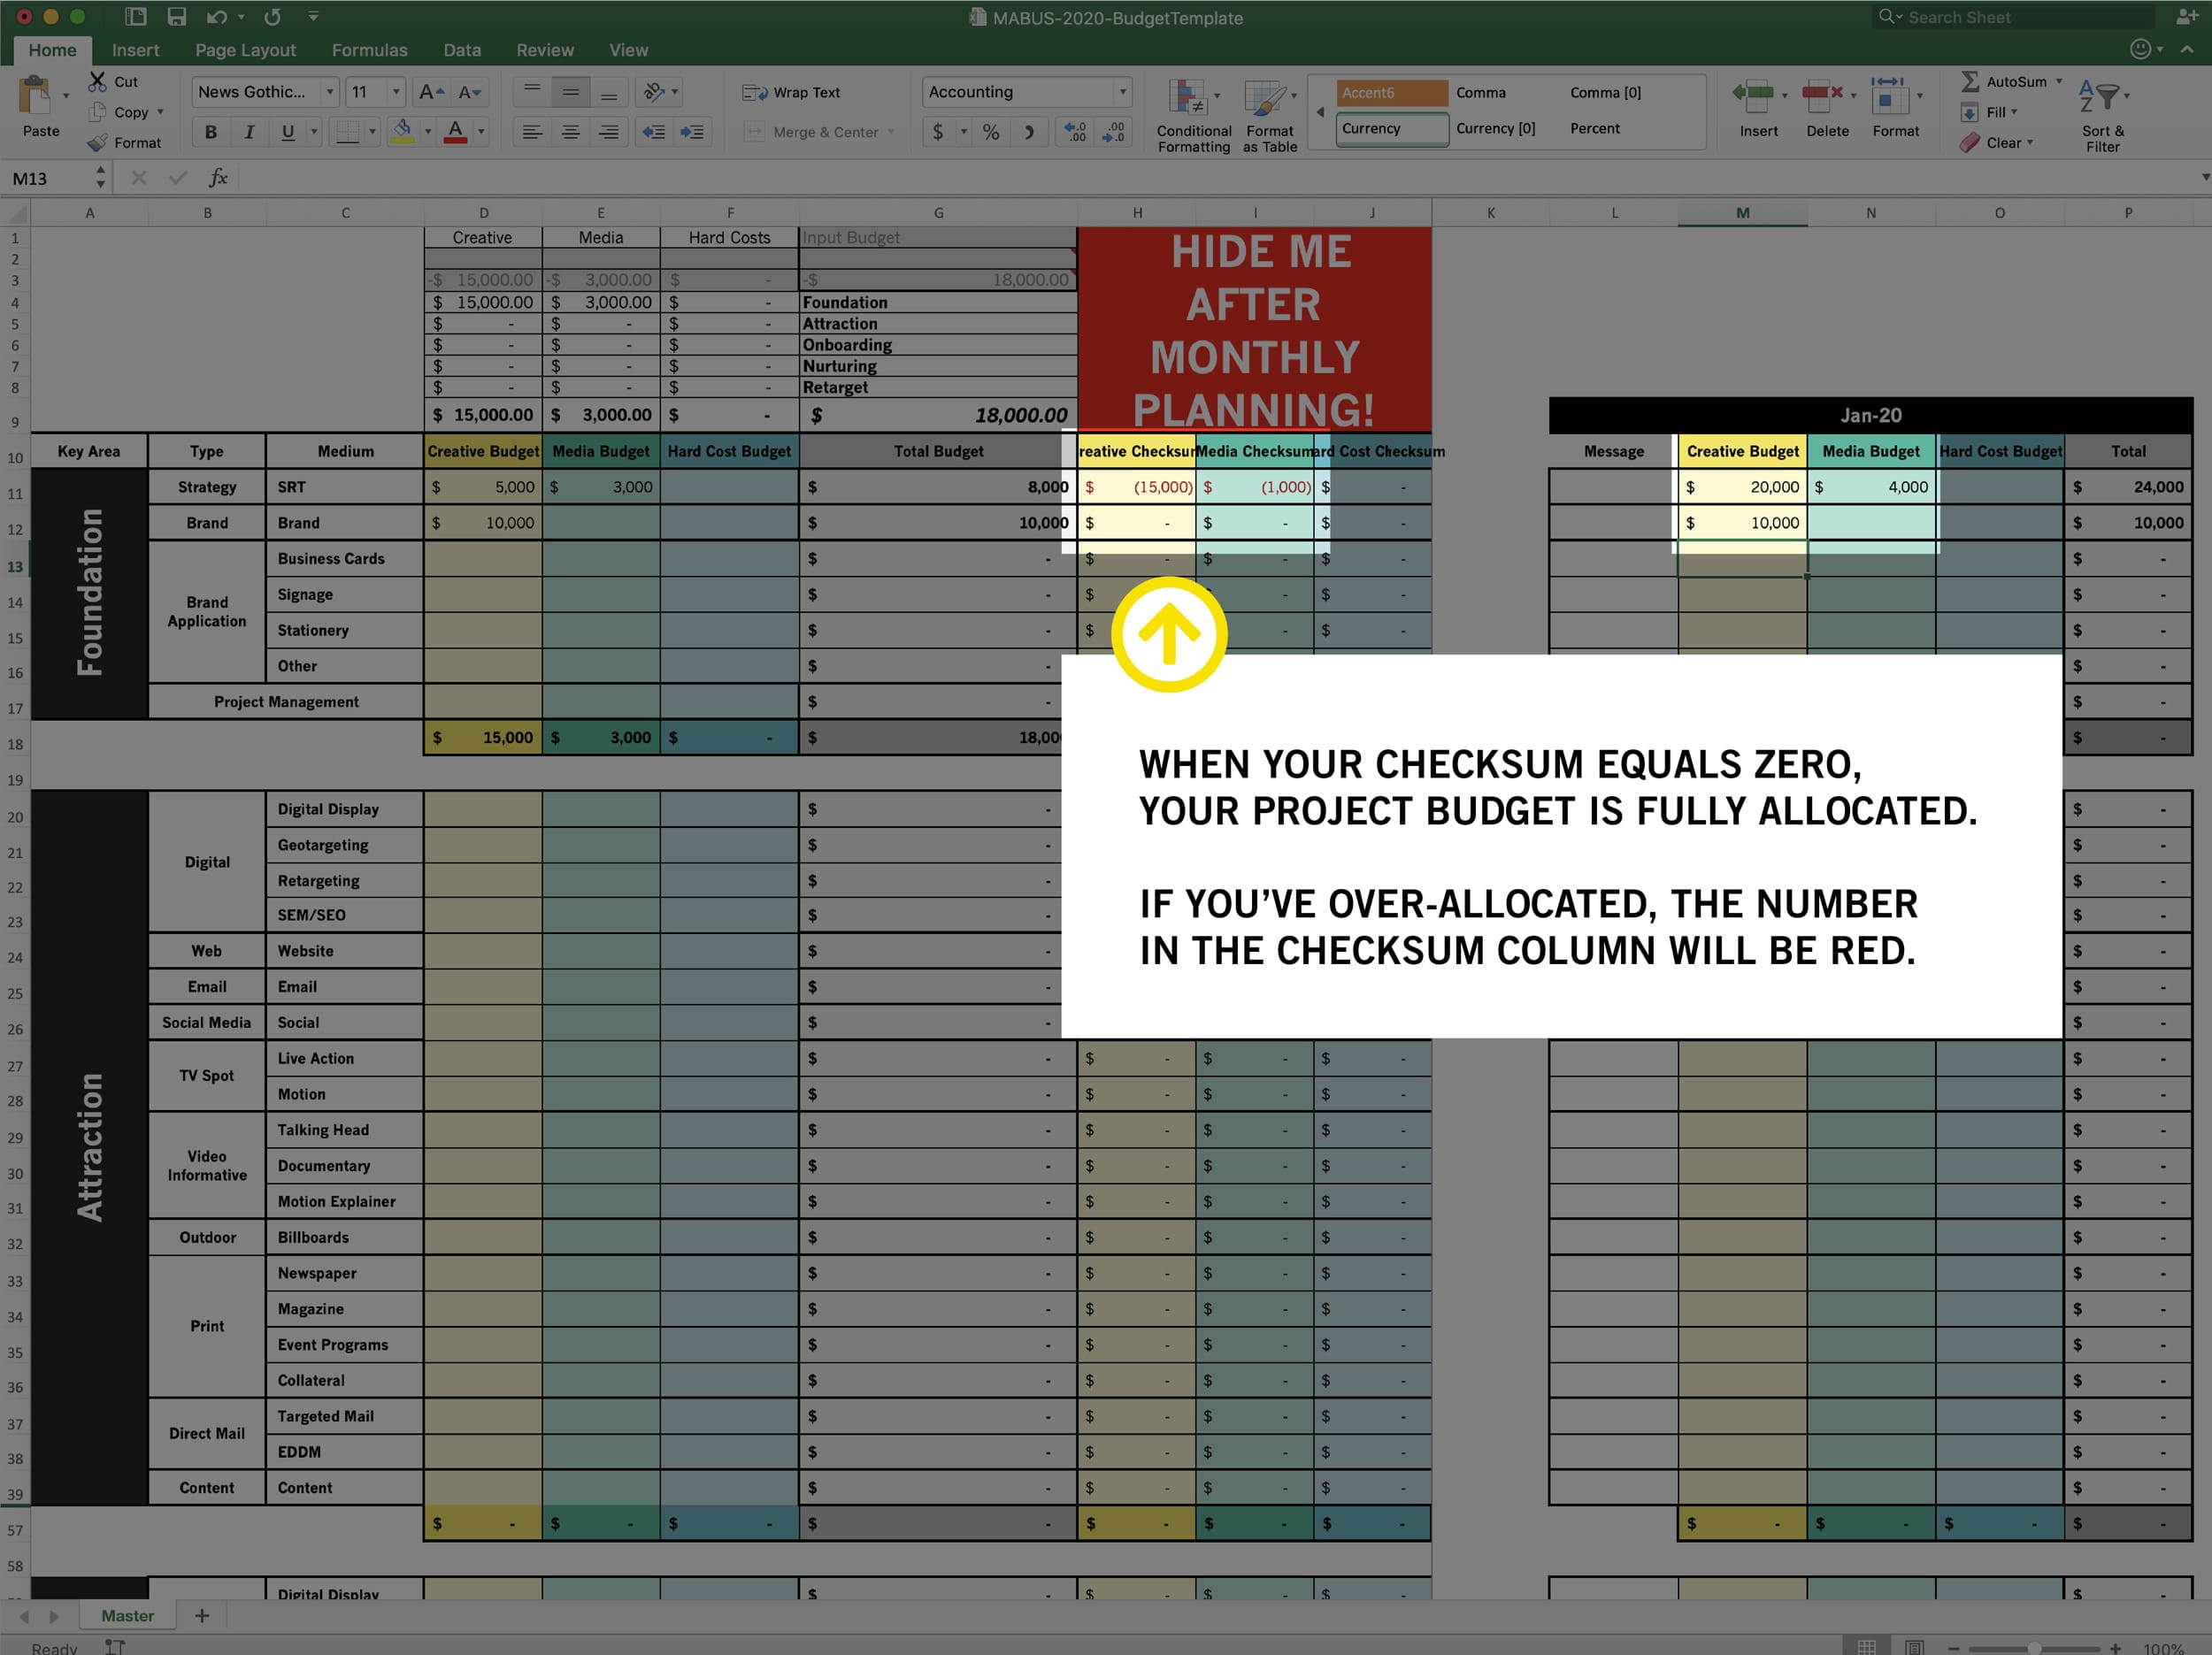
Once all checksums reach zero, you have fully allocated your budget. This document is still flexible, and you may move items around once you review your monthly cashflow.
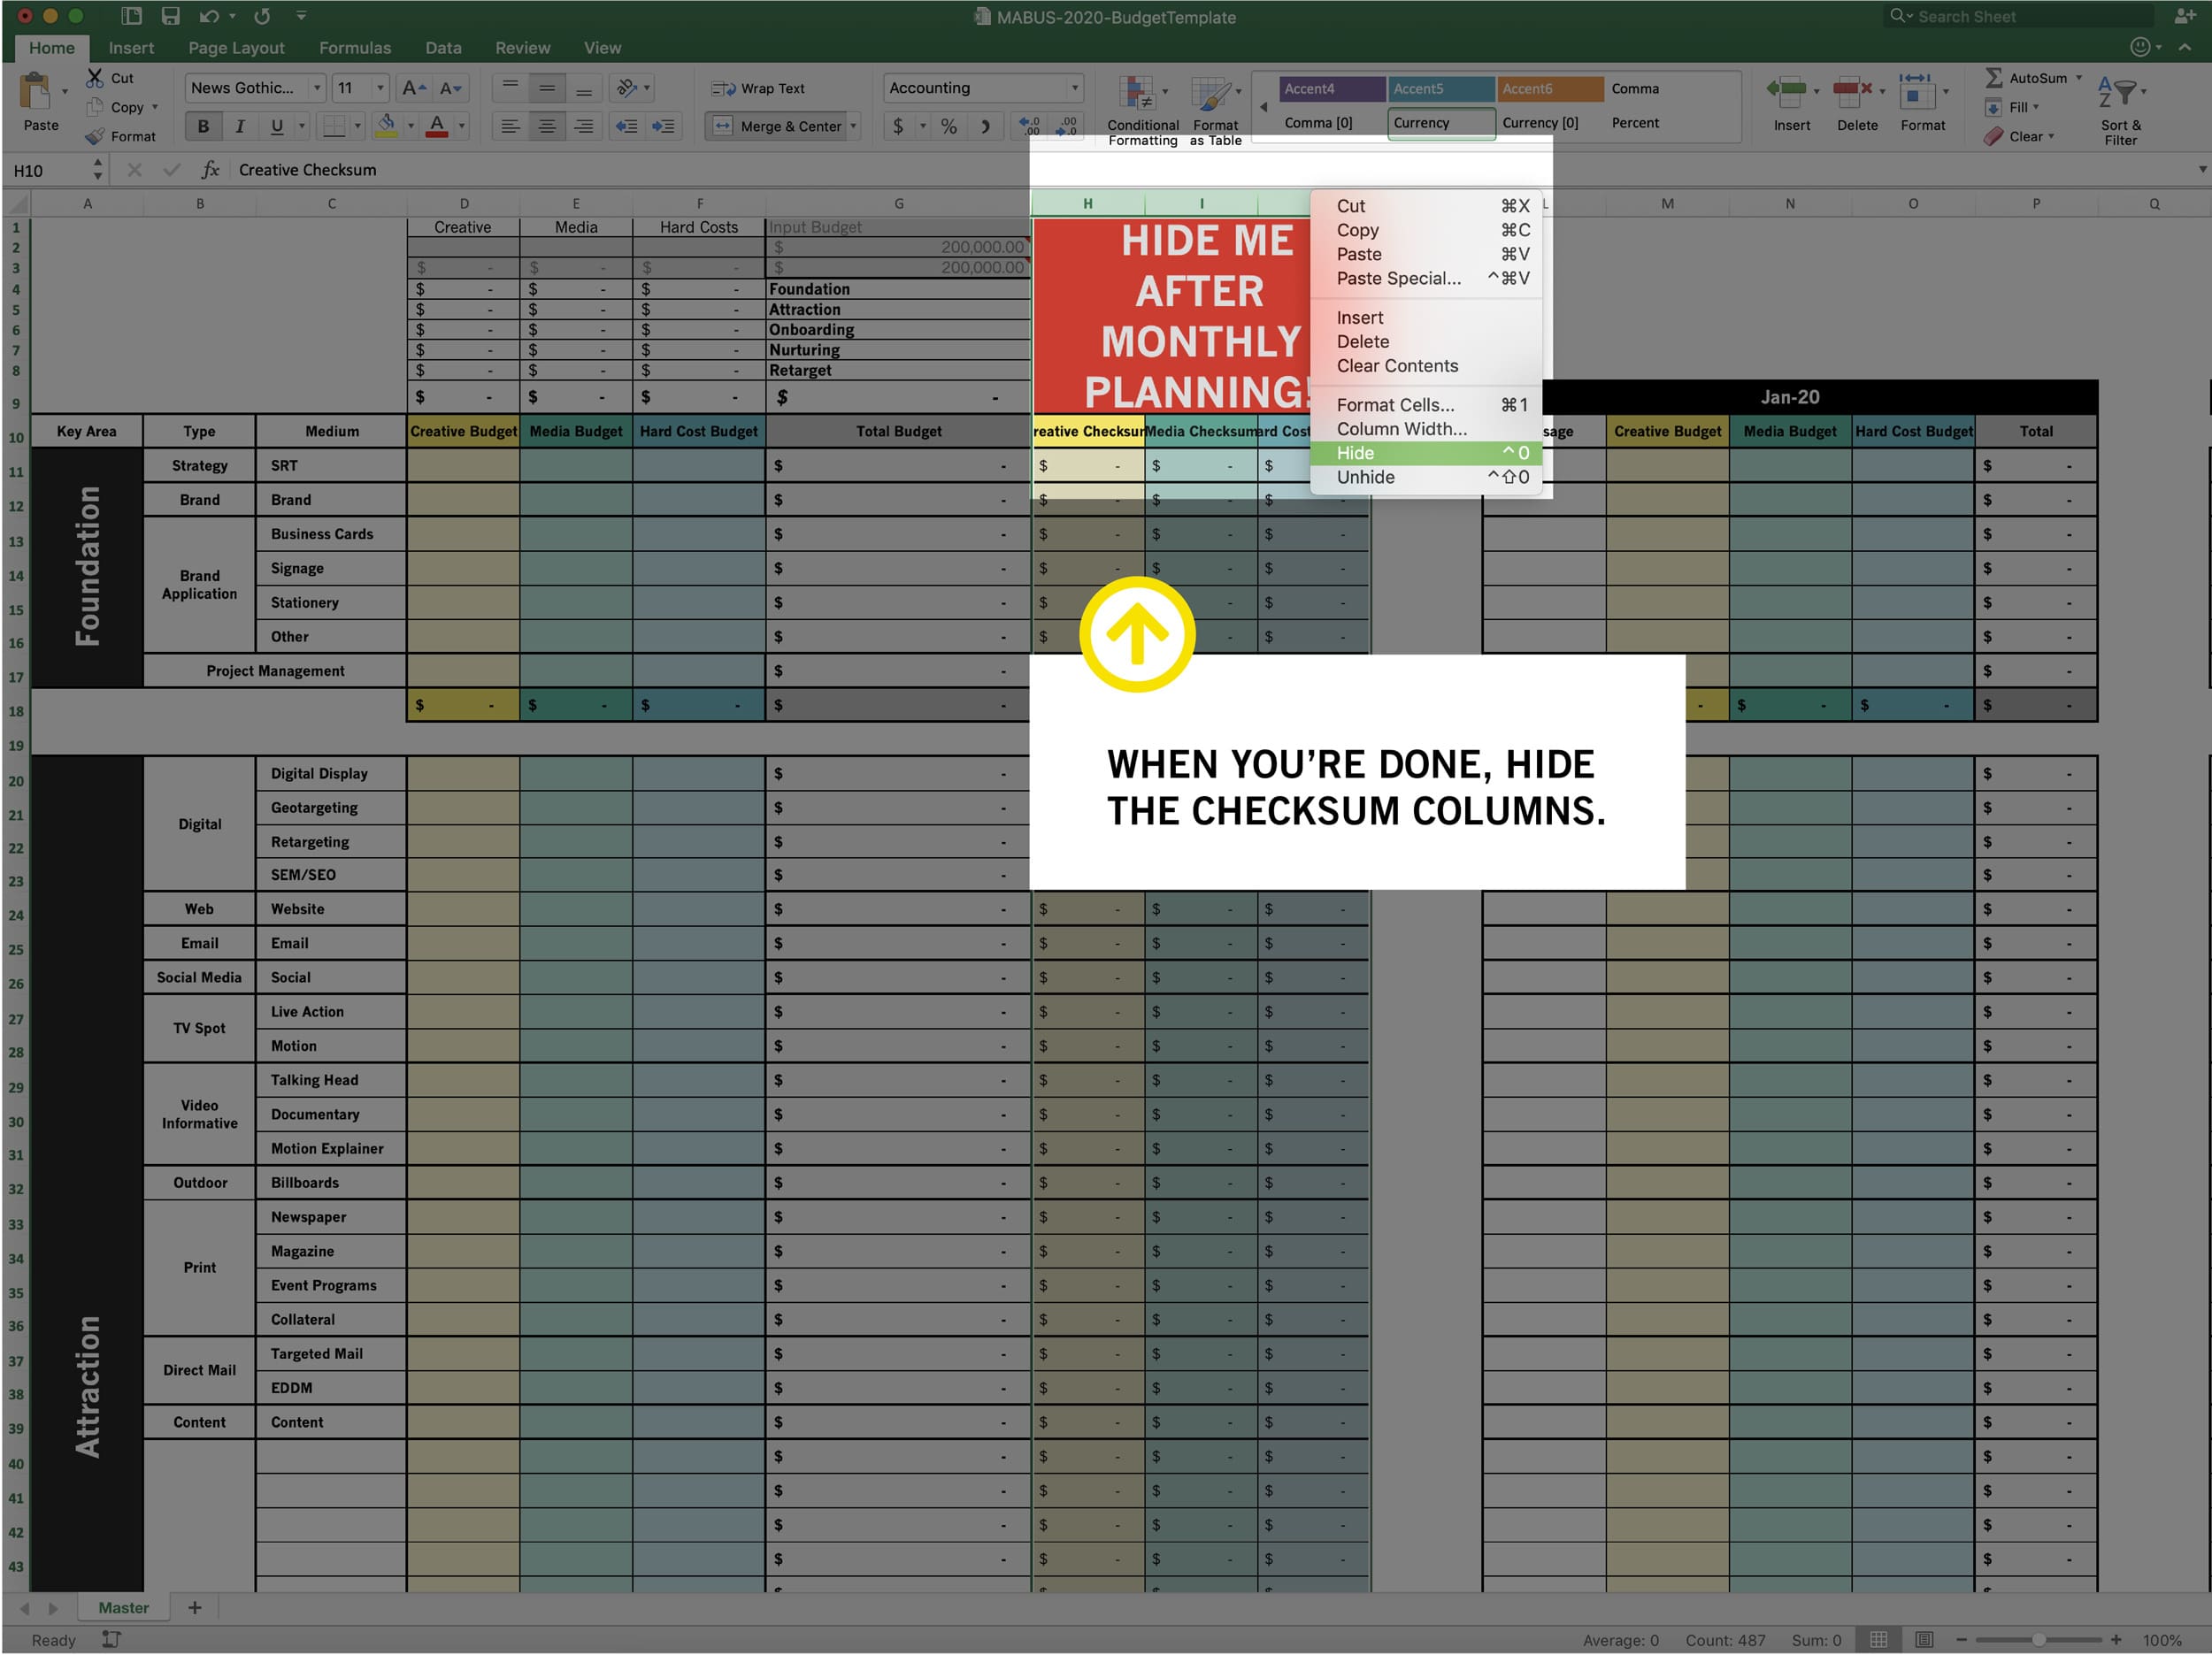
The final step is hiding your checksum column, as it will not be needed until the next budgeting cycle.
Now you have a comprehensive, interactive budgeting document.
